Table of Contents
Microsoft Entra ID (ex Azure Active Directory) can serve as the identity provider to provide single-sign-on (SSO) user login to Bannernow.
Bannernow supports SSO via SAML, a standard in wide use by enterprises and companies to provide authentication services to products that otherwise require separate accounts and logins.
Setting up Microsoft Entra ID to use SSO for Bannernow takes about 10 minutes. There are two main steps involving the Azure and Bannernow web interfaces.
Set Up the Identity Provider “IdP” Side (Microsoft Entra ID)
As an admin, log into your Azure Portal, browse to Microsoft Entra ID, then follow the following steps:
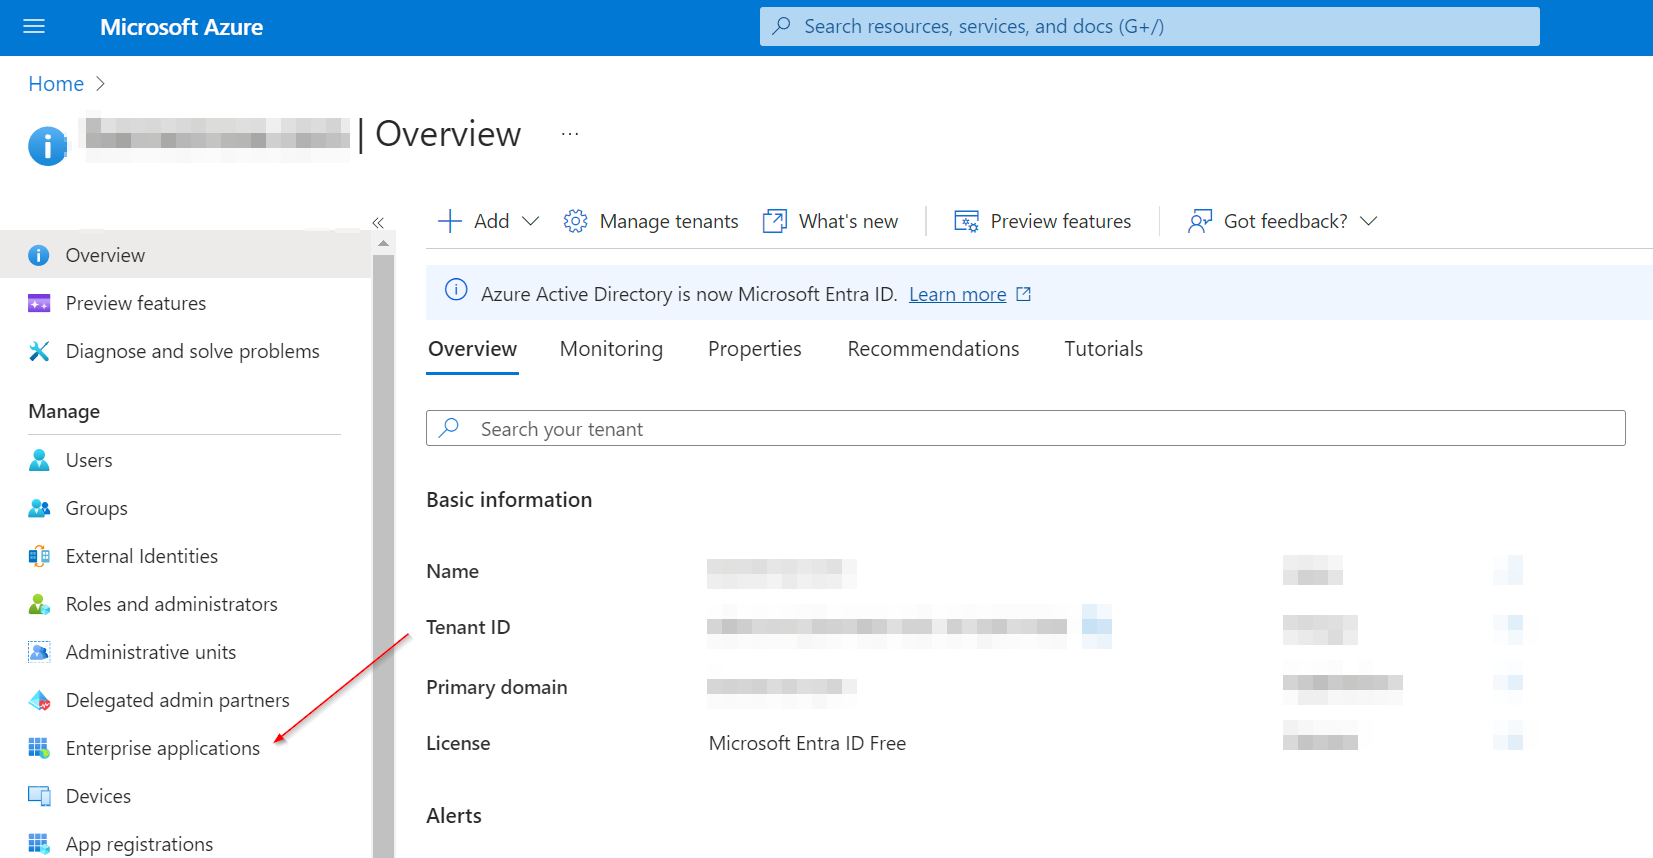
Step 1
Go to Enterprise applications in the sidebar.
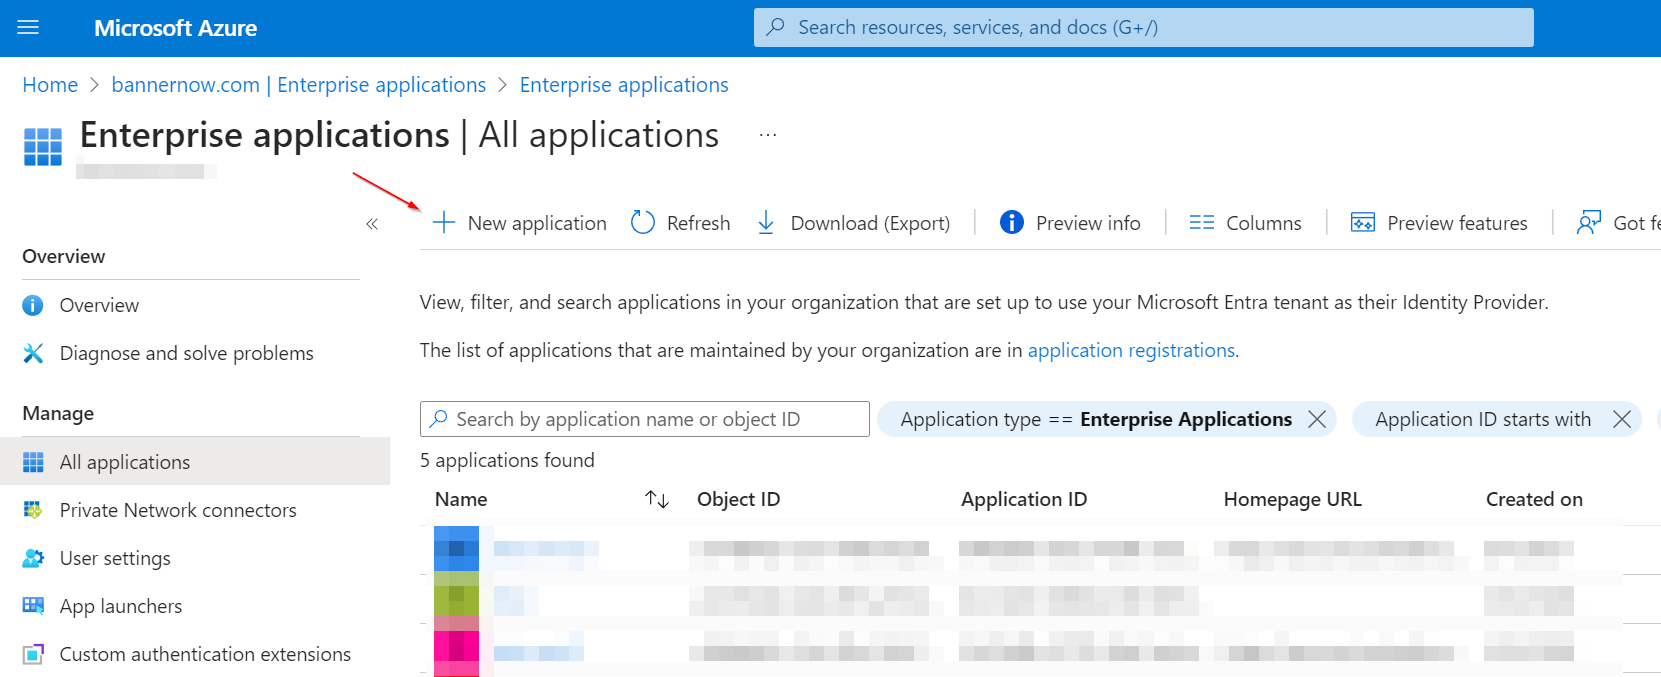
Step 2
Create a New Application
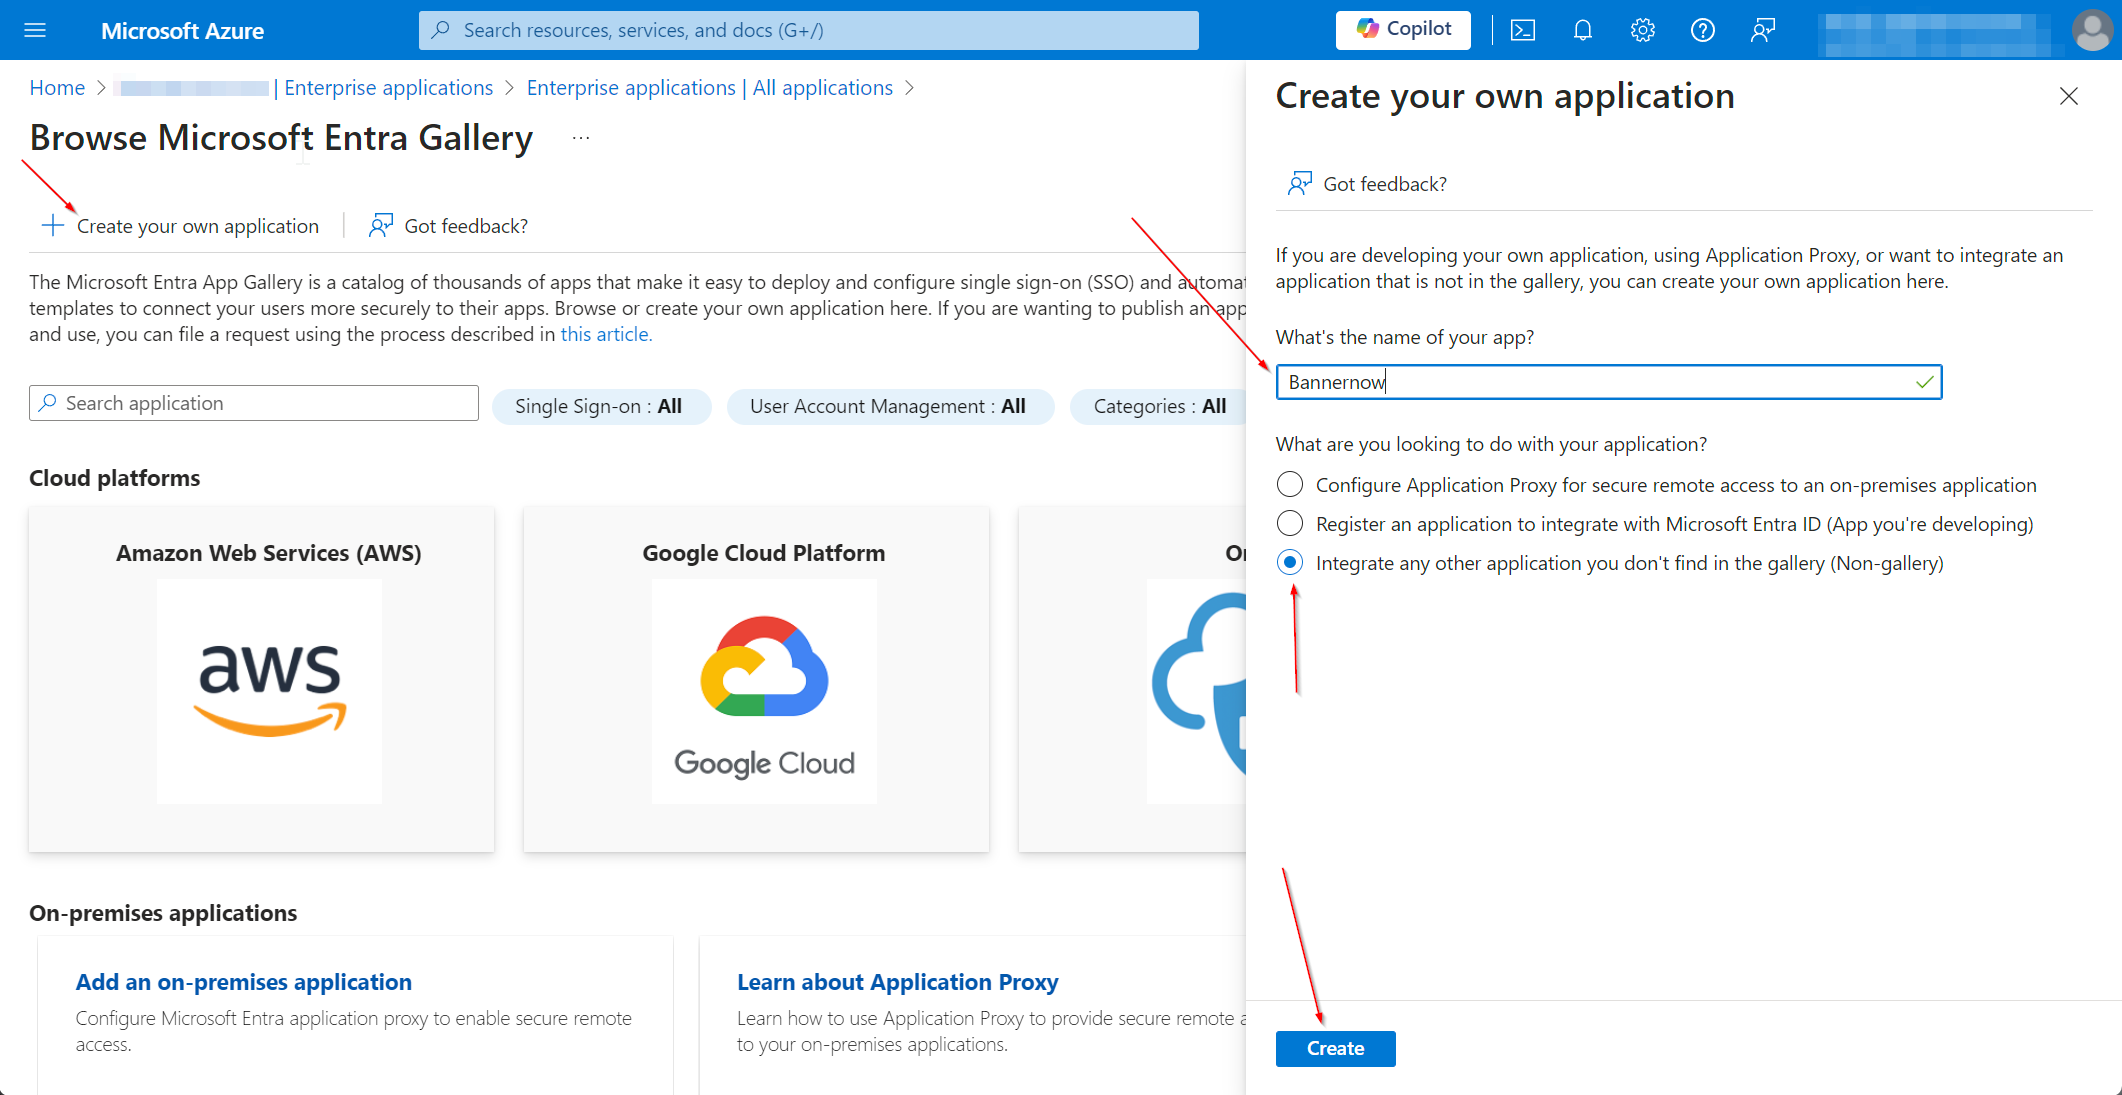
Step 3
Give your application a name and select Integrate any other application you don’t find in the gallery (Non-gallery). Then click Create.
Step 4
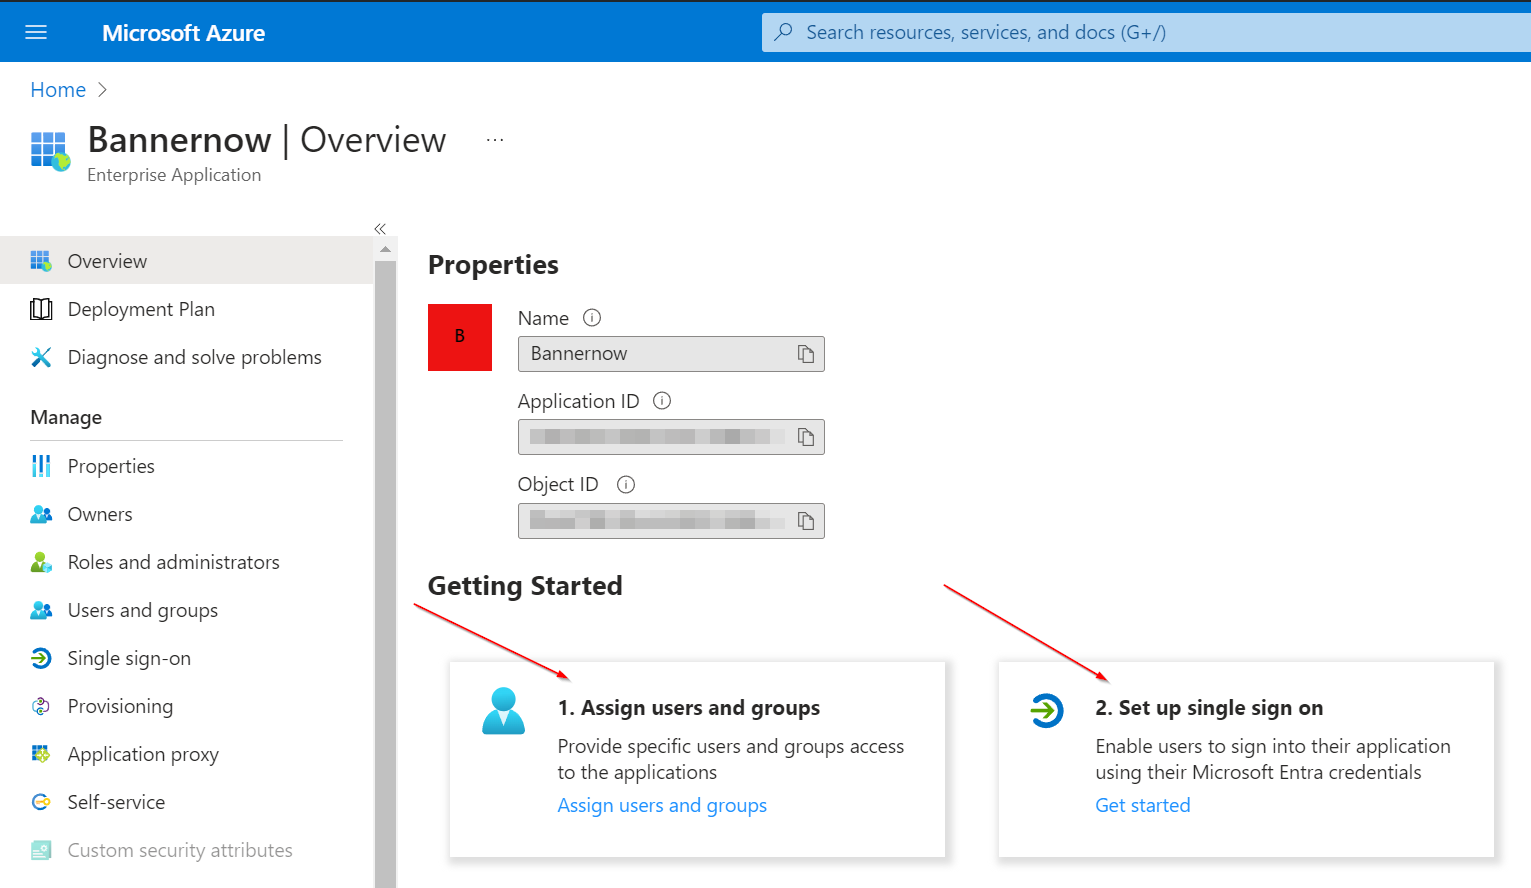
First assign users that will have access to Bannernow through SSO then click on Set up single sign on
Step 5
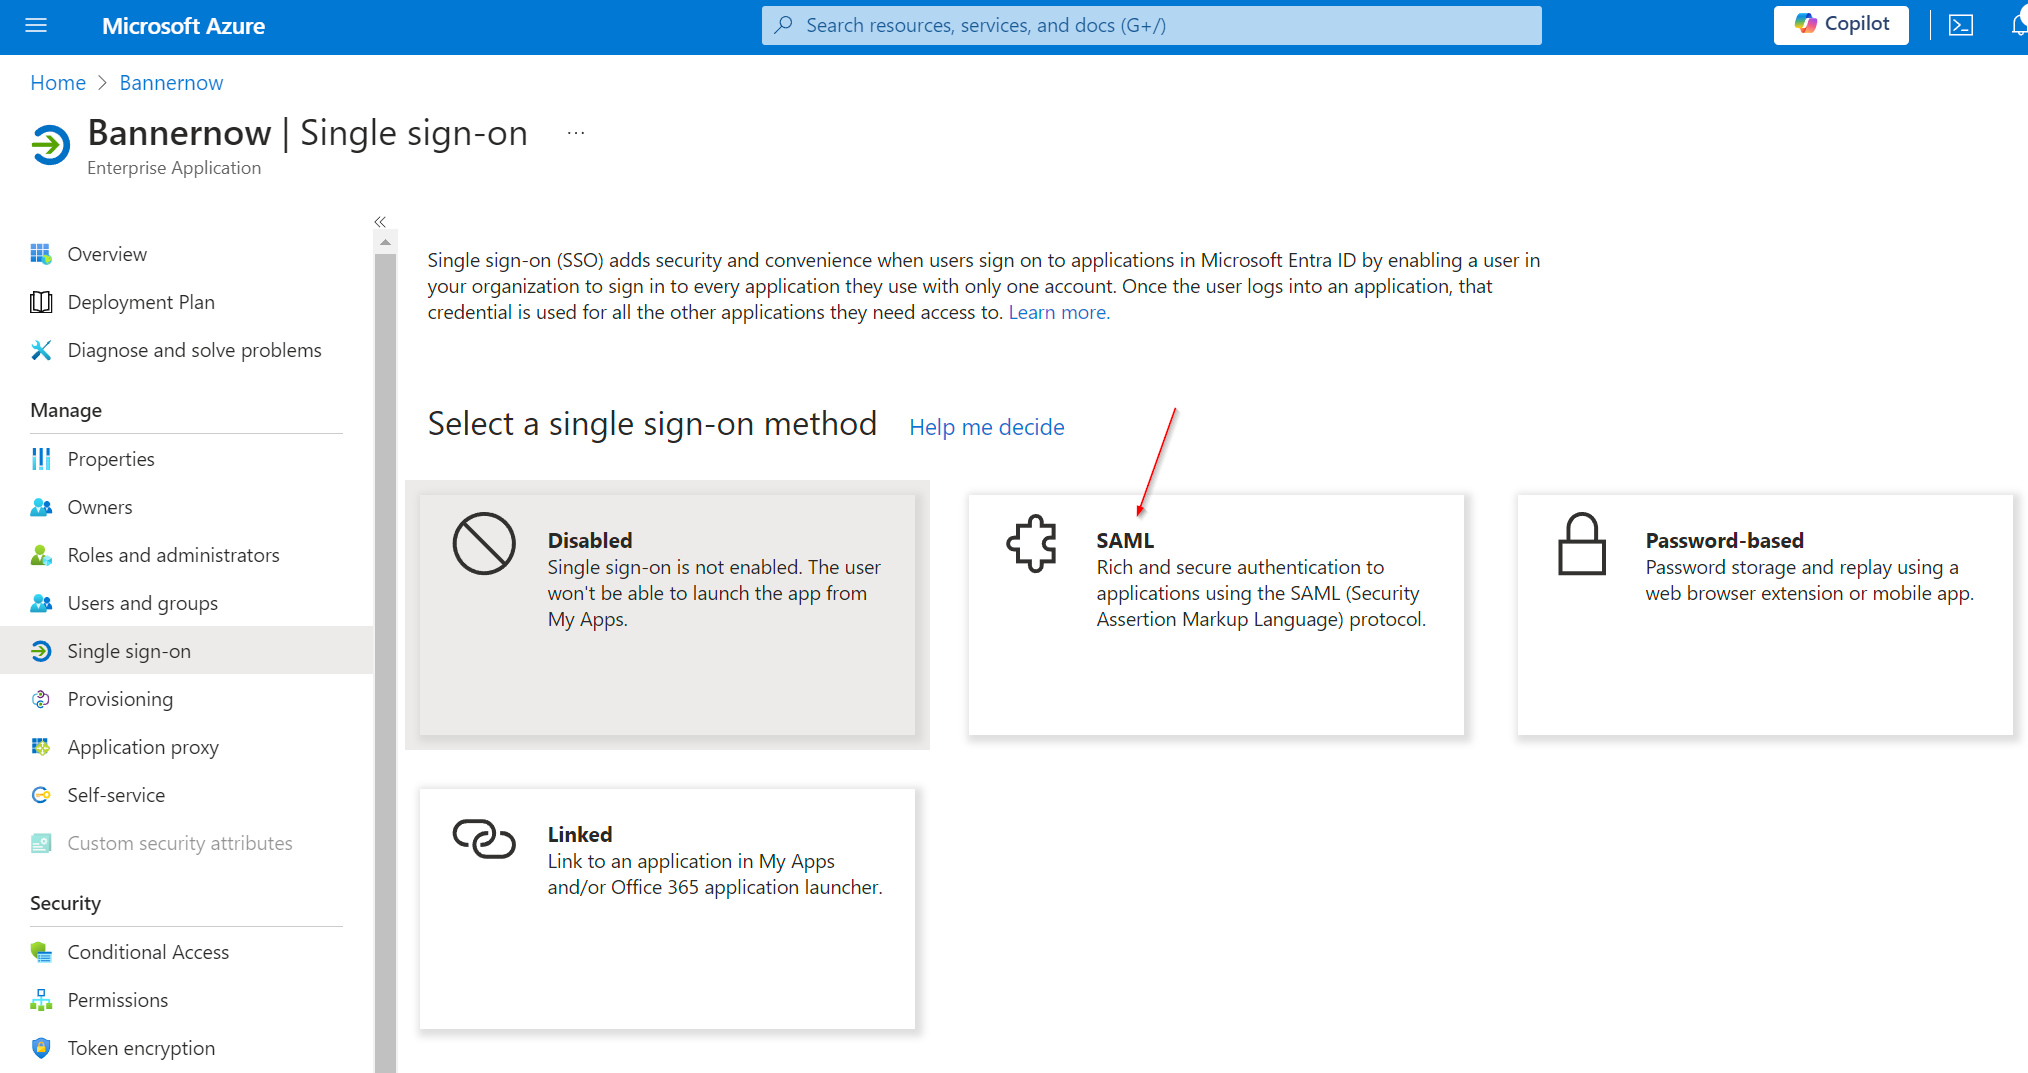
Select SAML option
Step 6
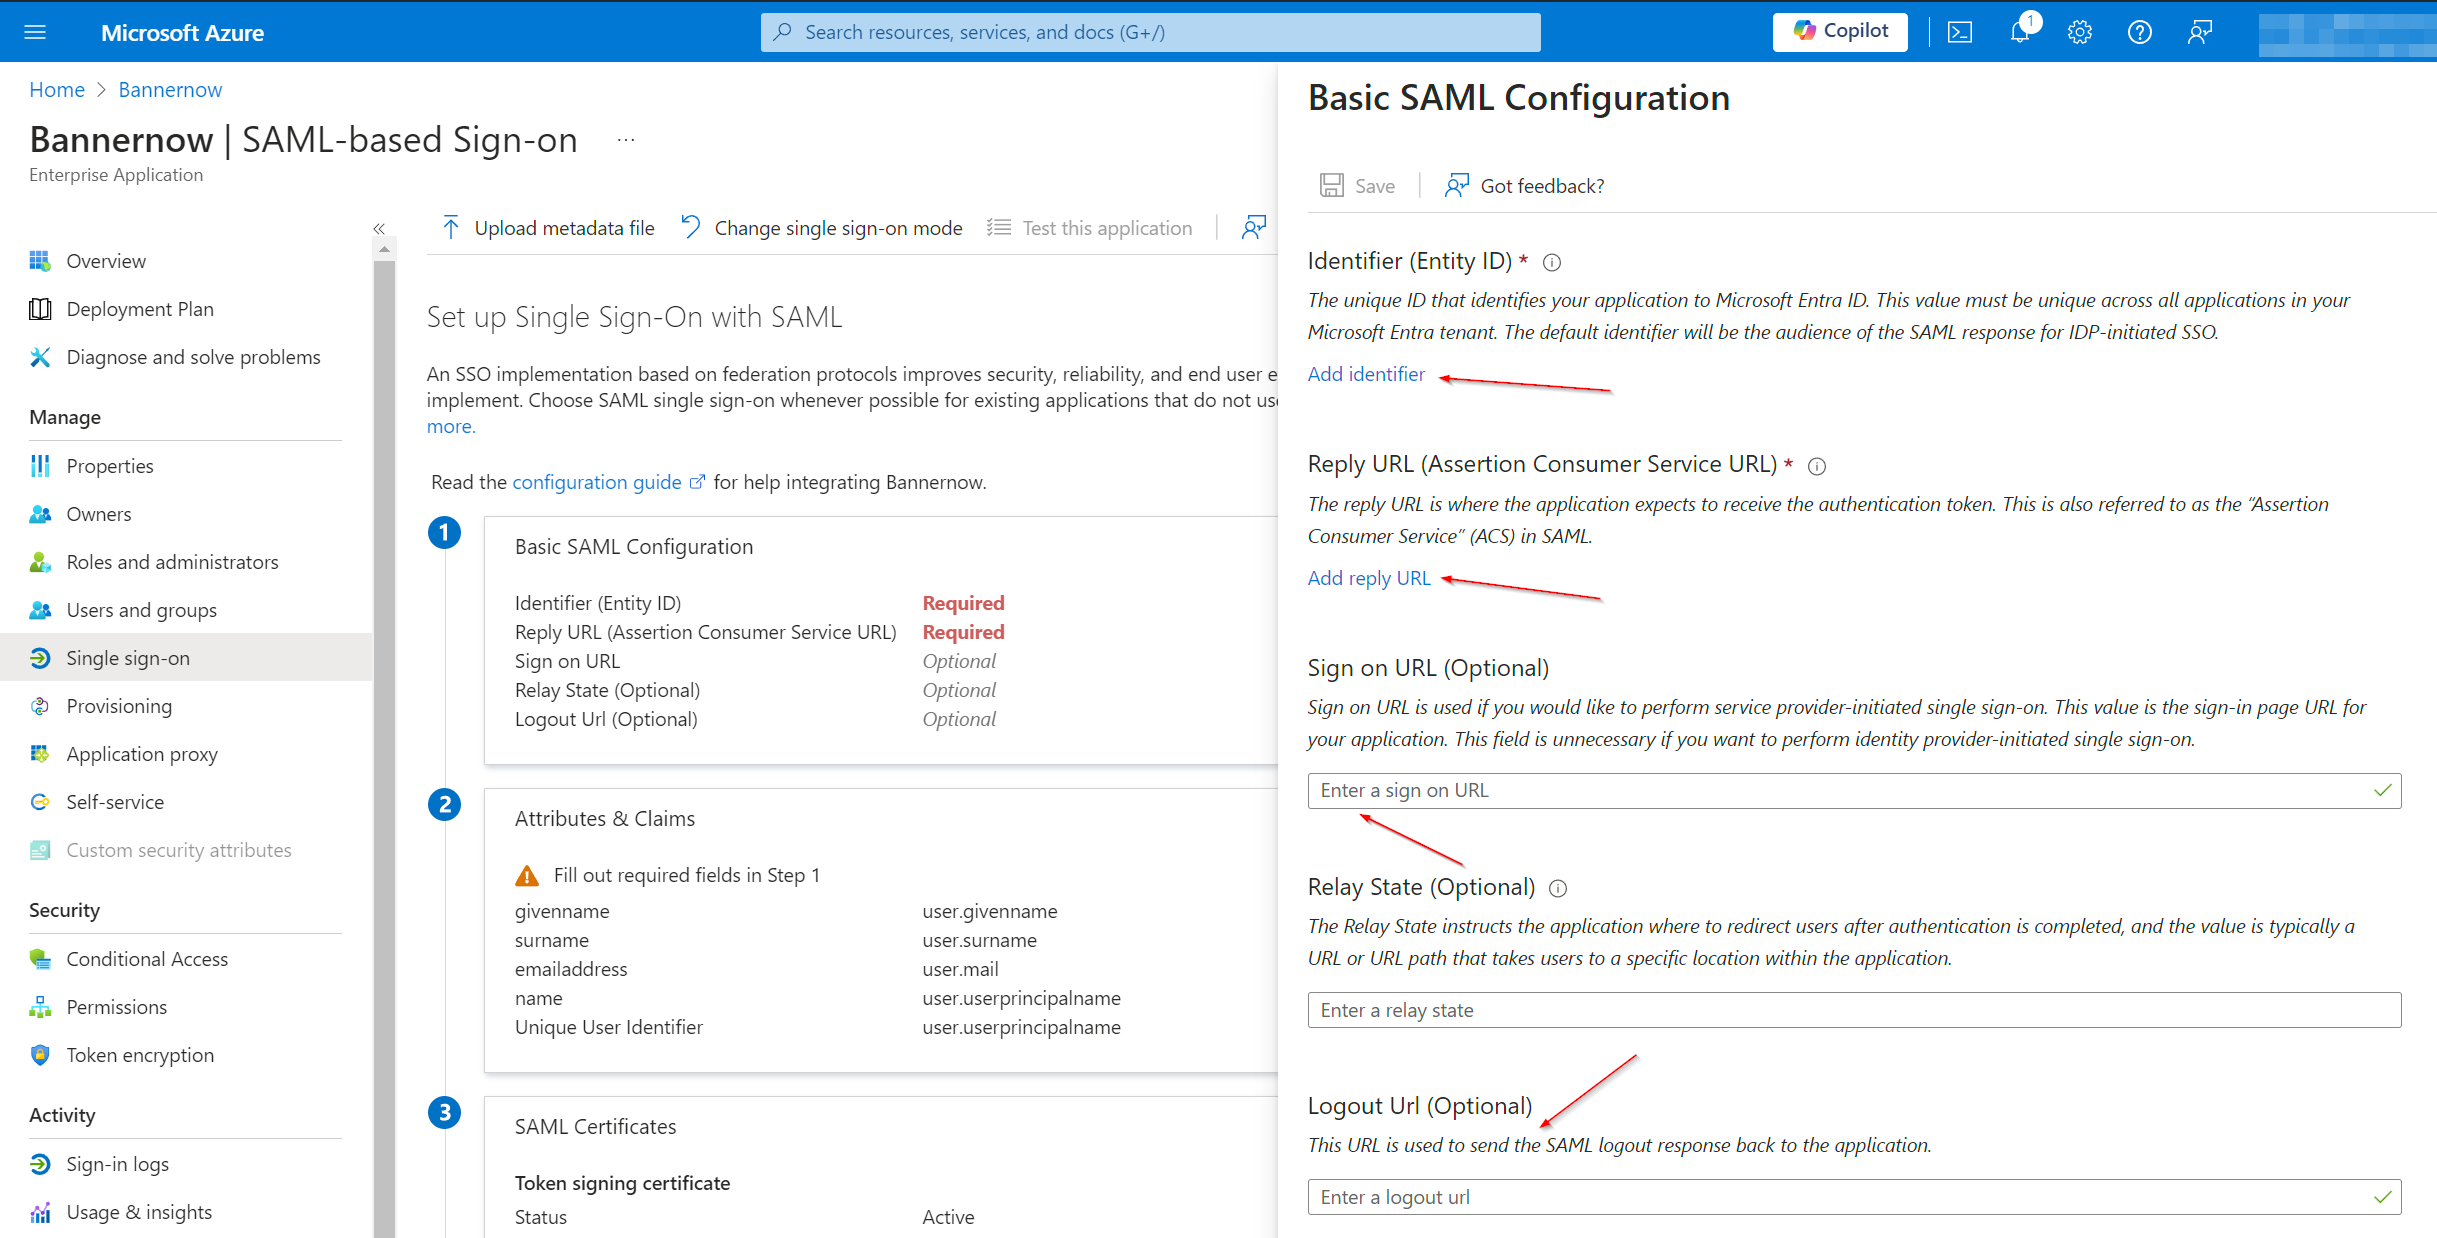
Click Edit for the first Step then add Identifier and Reply URL and open Bannernow in a separate tab to get those values.
Step 7
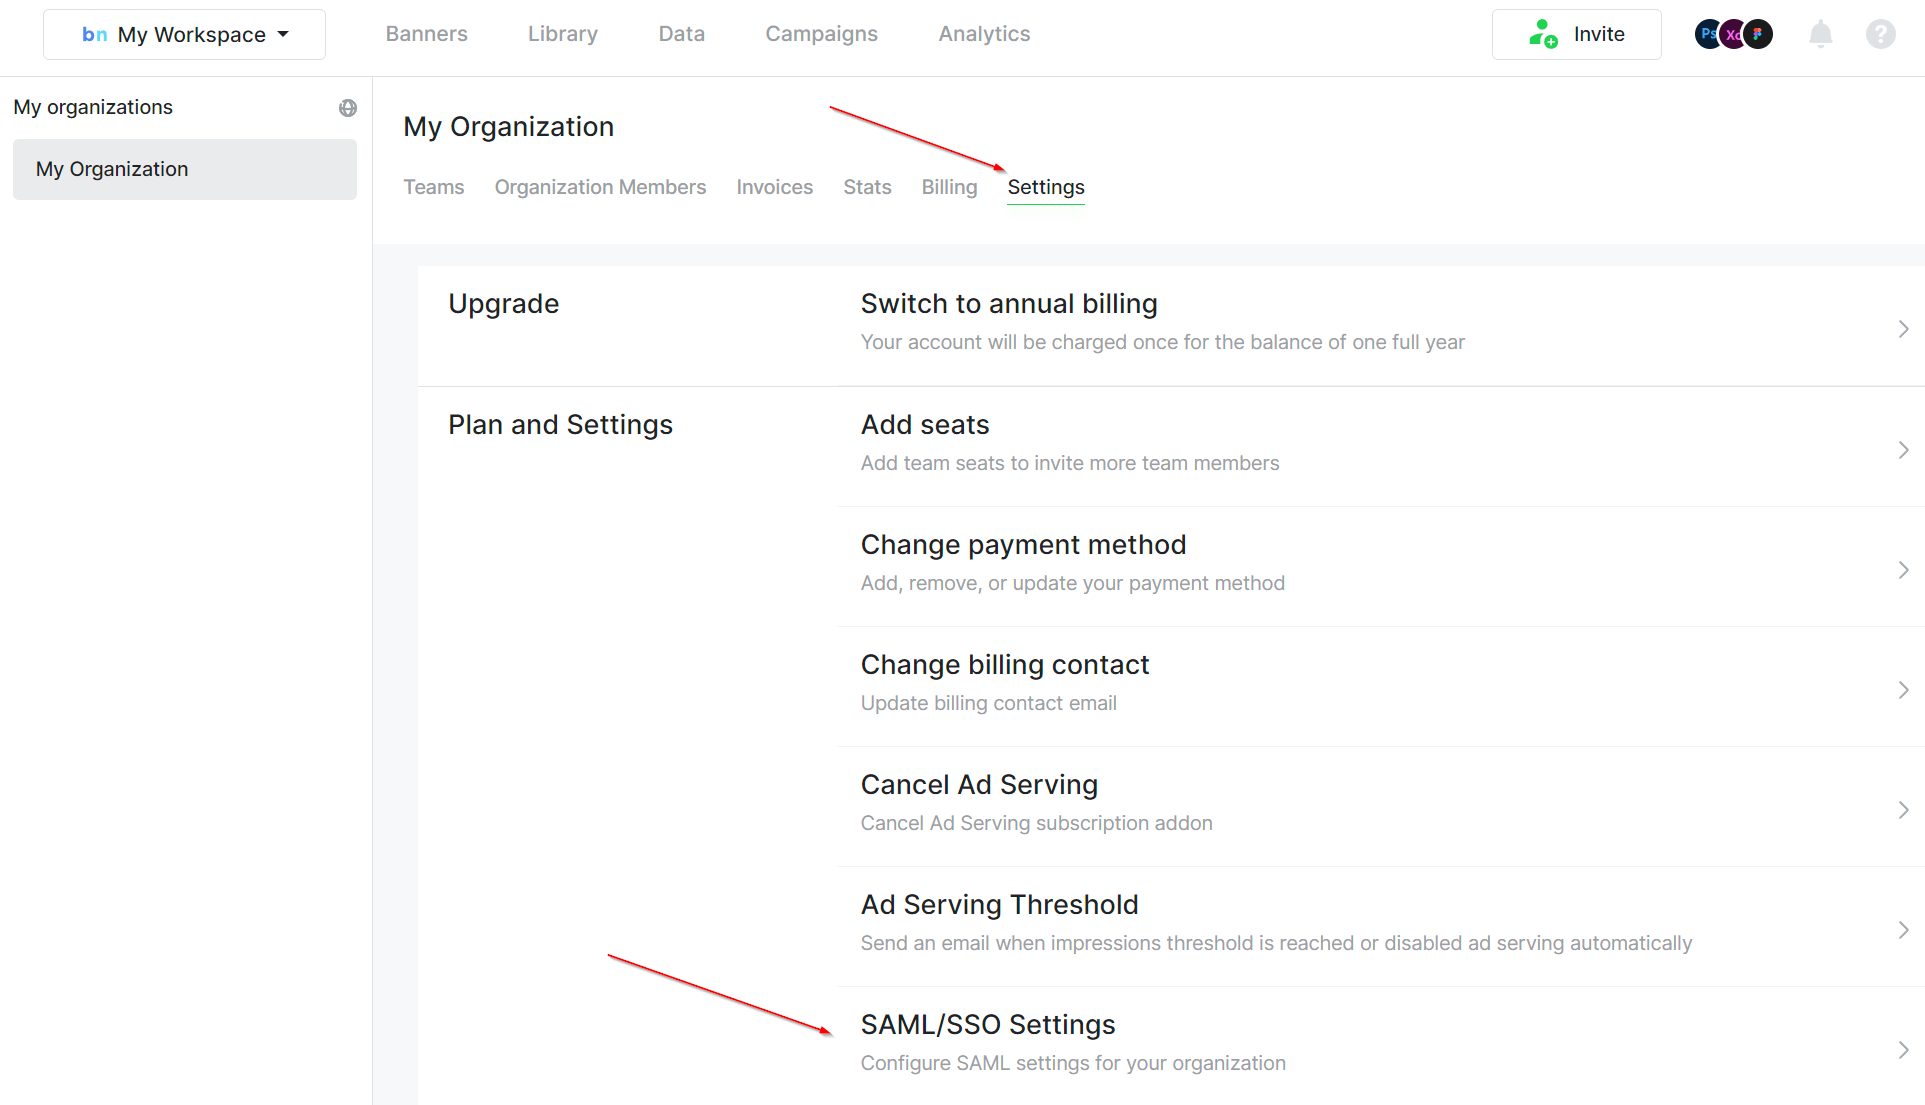
Go to Organization Settings in Bannernow then go to Settings tab as shown below. Then choose SAML/SSO Settings. (keep in mind that these settings are available only for the Organization owner)
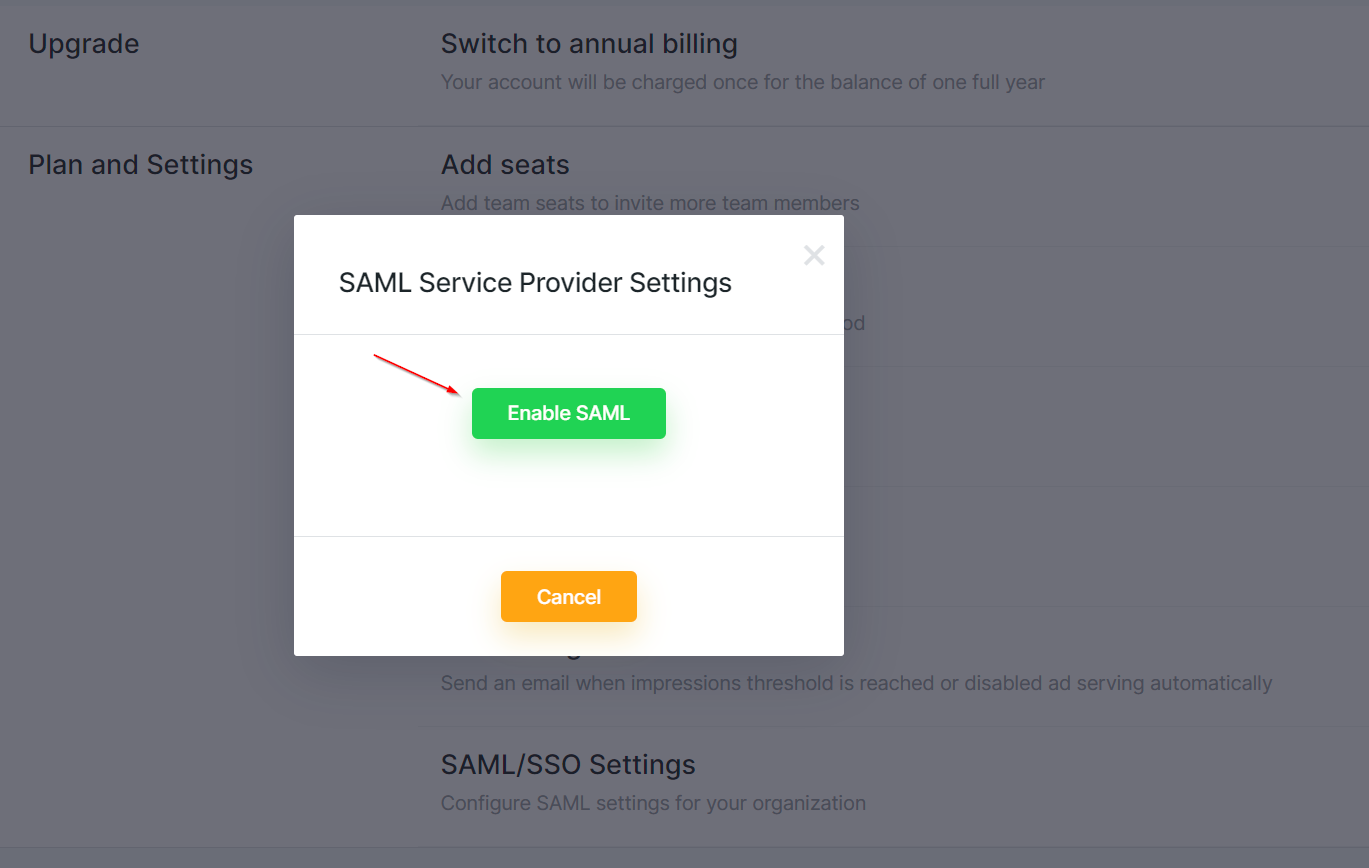
Step 8
Click Enable SAML
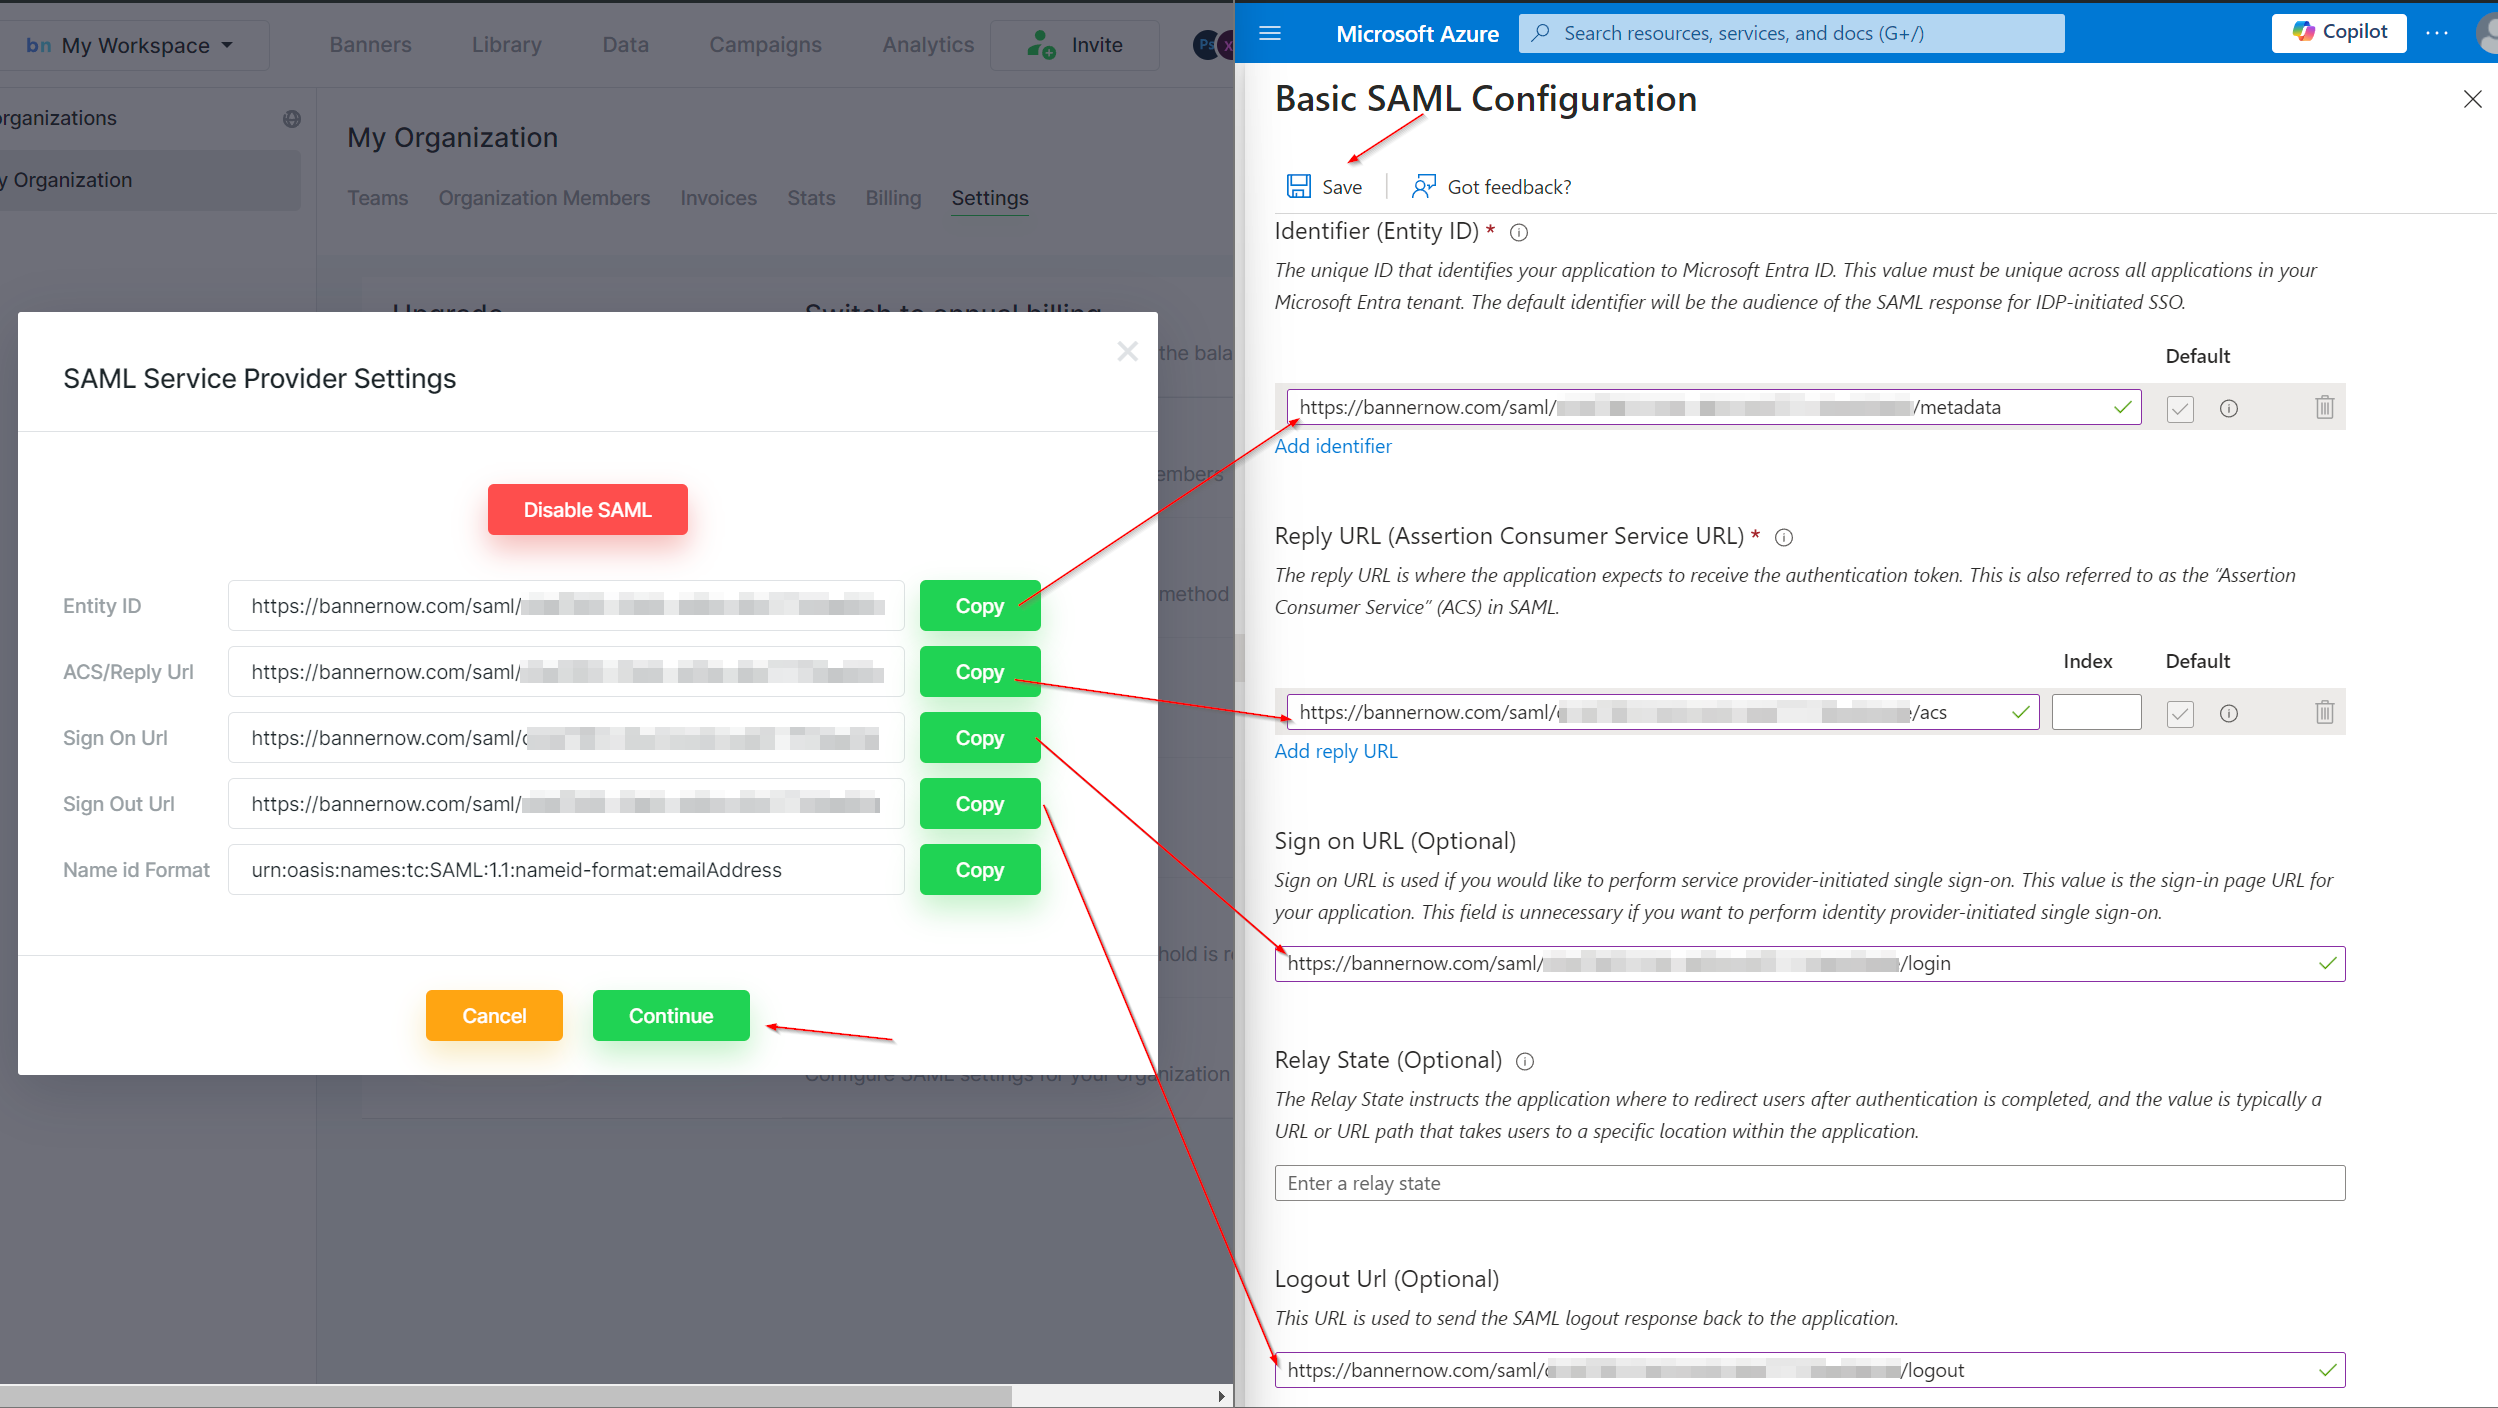
Step 9
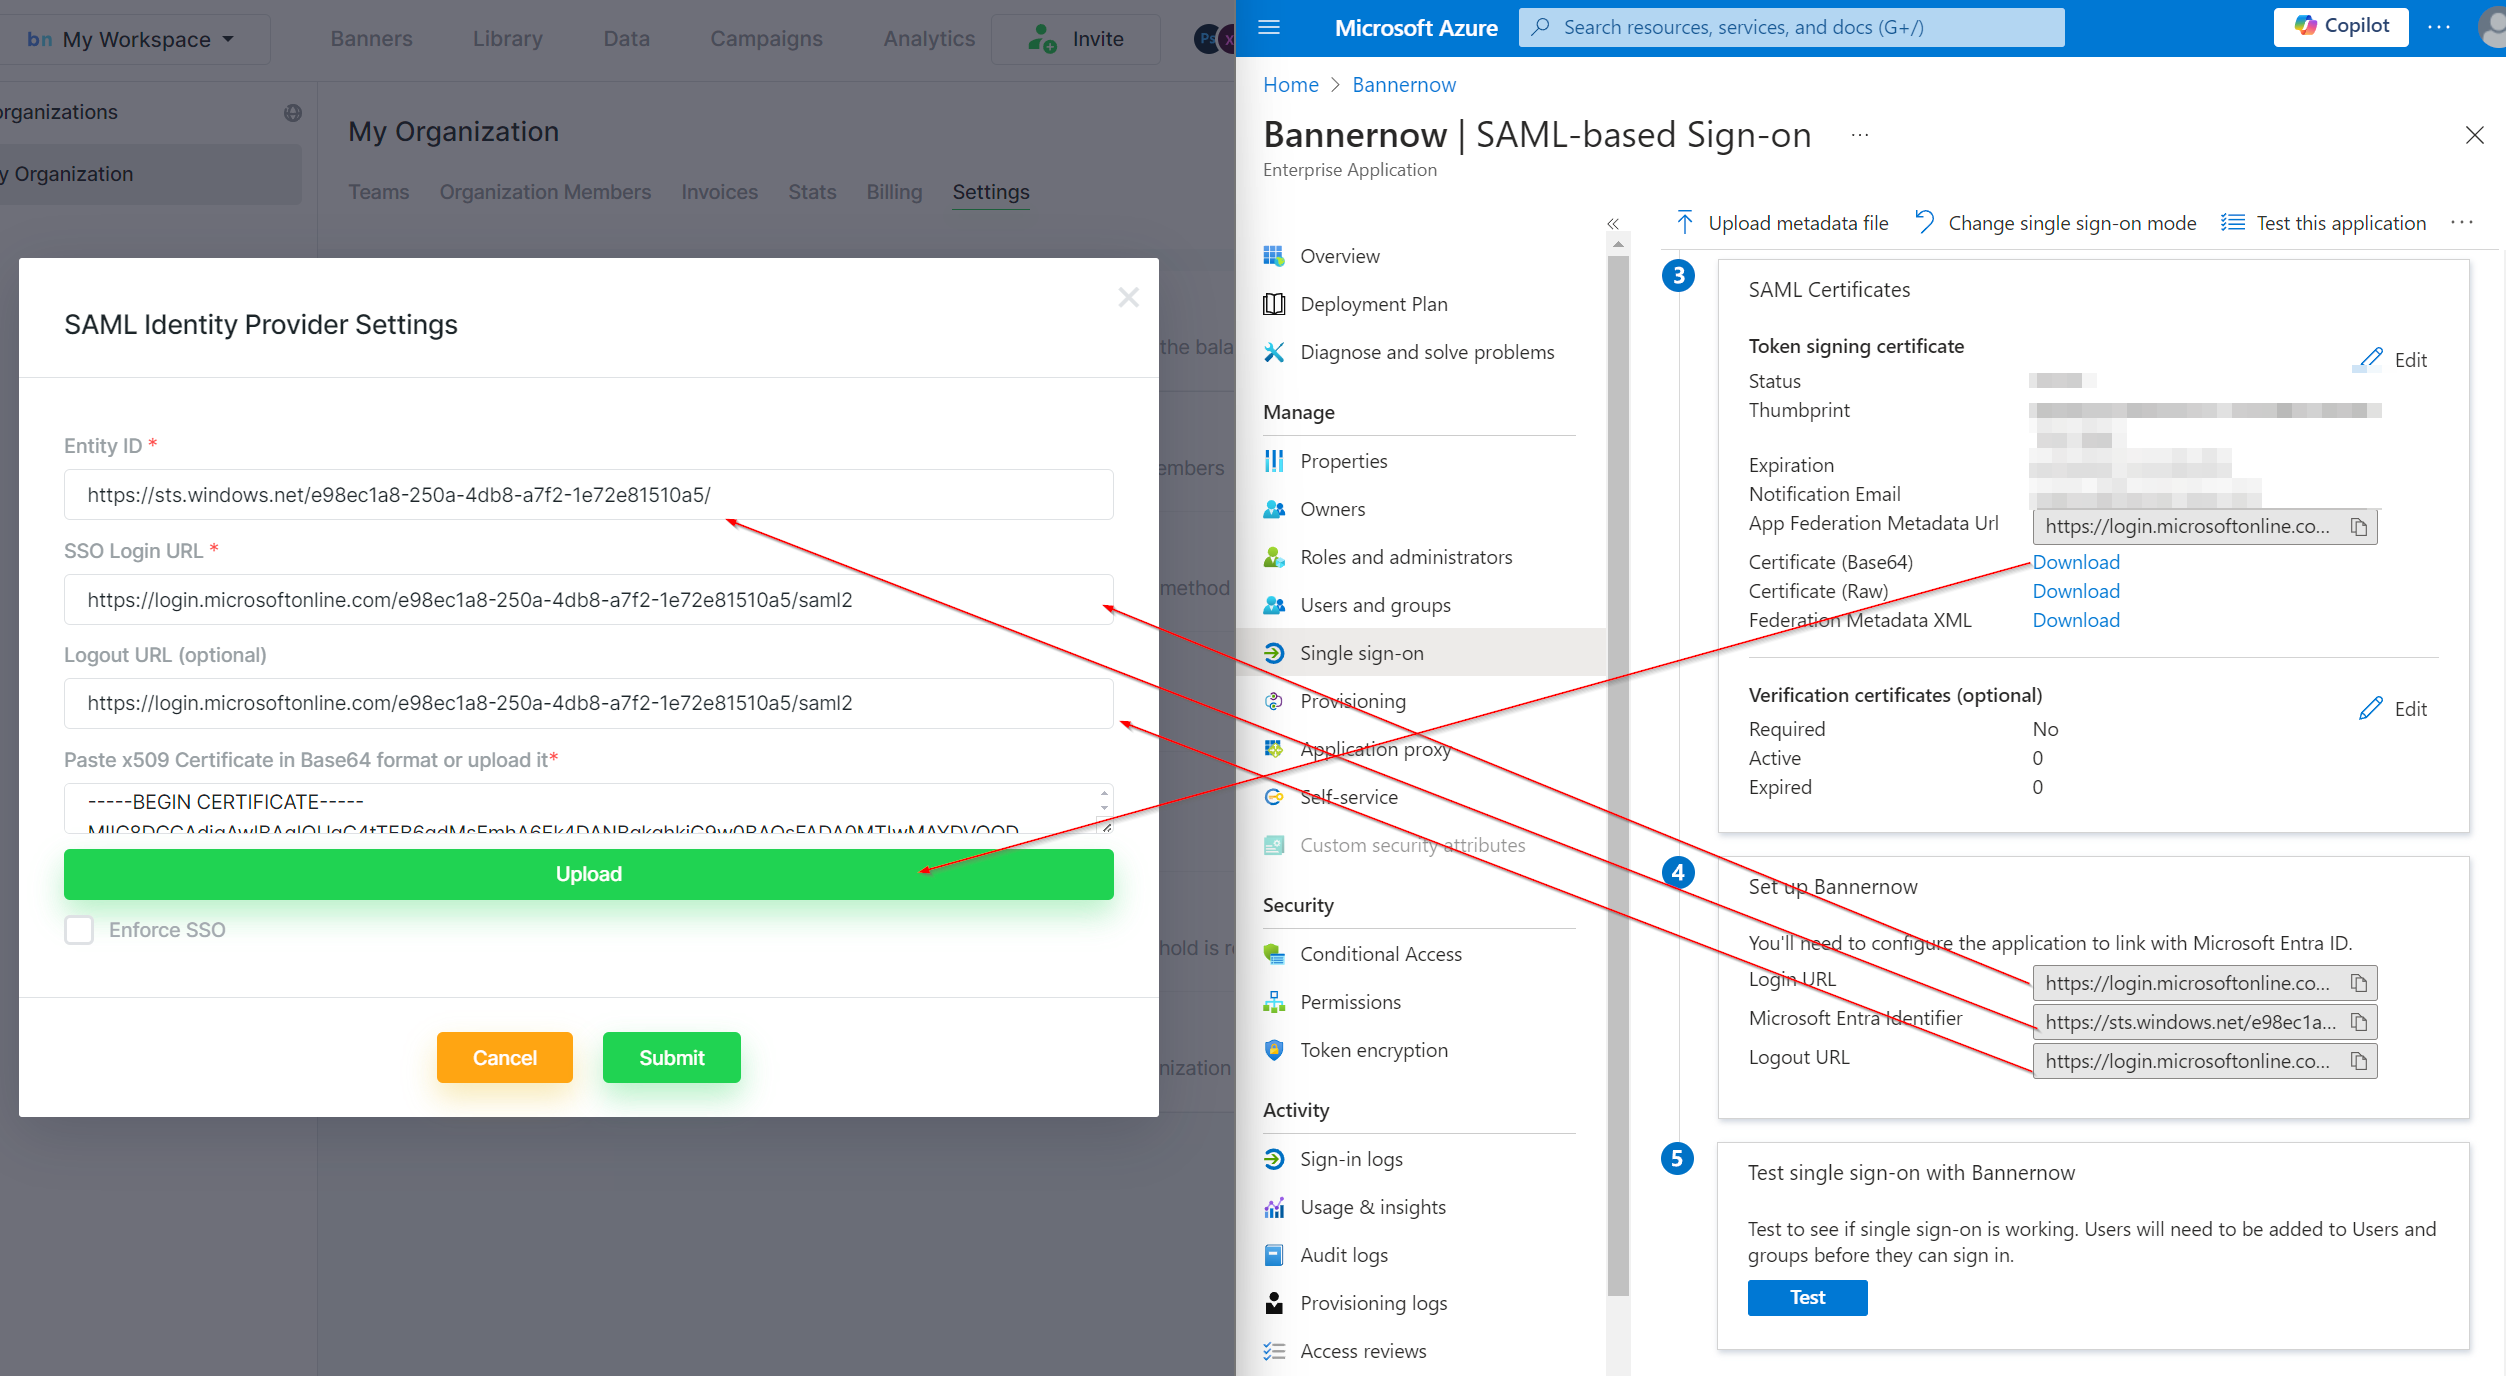
Then copy all related fields to Azure SAML settings as shown below. Then click Save in Azure dashboard and Continue in Bannernow.
Step 10
Finally in the last step copy urls from Azure SAML settings Step 4 to Bannernow SAML settings. Download Certificate from Azure SAML settings Step 3 in Base64 format and upload it to Bannernow SAML settings as shown below.
Check Enforce SSO so all users in your organization will be forced to log in into Bannernow only through Microsoft Entra ID. (keep in mind that you would need to have 2FA enabled in your account first).
Click Submit in Bannernow and that should be it. You can test SSO from Bannernow login page.